Events
Paminga includes native event management capabilities.
You can create digital and physical events, easily list upcoming events on your website or landing page, invite attendees, allow them to register, and support self-check-in via mobile device or assisted check-in by event personnel.
Paminga also supports "promotion code pools" – discount codes provided by you may be assigned to leads/contacts upon event registration (and included as dynamic content in emails).
Of course you can segment on who has/has not registered and who did/did not attend your events. This extends your event capabilities across Paminga.
If you need to manage multi-day events, or to setup registration for multiple sessions during your event, you'll need to leverage a 3rd party event platform.
Please let us know if such functionality is important to you. Your feedback drives our priorities.
Event Creation
Automatic via Integration
Events (Digital and IRL) are commonly created automatically via integration with an events platform like Zoom.
Manual Event Creation
For simple IRL (in-person) events, Paminga may be all you need, no 3rd party events platform required.
Events may be created, edited, and viewed by navigating to Marketing Center -> Events.
Finder Integration
Organize your Events in Paminga's Finder by editing your event and selecting a folder.
Add Your Event to a Finder Folder

Personalization via Event Tokens
Events that are housed in Paminga's Finder automatically expose their properties as Folder Tokens.
Don't type your event's name into an email or landing page. Rather, use the folder token for the event name.
Then, if you edit the event's name in the future, all of your emails and landing pages are updated automatically!
The same applies for other properties like the event's registration URL, start and end date/time, etc.
Invite Contacts to Register
Paminga offers a variety of ways to invite contacts to register for your events.
Email Drip Series
Open the Finder and right-click on the folder that contains your event. Create a new Drip Series in this folder.
- Create emails that urge contacts to register for your events
- Create each of these emails in the Finder folder that contains your event. Even better, create a child folder for your invitation emails
- Be sure to use folder tokens to inject the event's properties (name, date/time, registration URL, etc.) into your emails. That way, if any of your event's details change, your emails are updated automatically
- Send those emails via a Drip Series with whatever cadence you choose
- Create the perfect audience for your Drip Series with Paminga's Segment Builder
- Add a Goal that will remove contacts from the Drip Series when contacts register, and add them to your "reminder" Drip Series automatically
CTAs on Your Website
Create one or more CTAs to promote your events on your website.
Open the Finder and right-click on the folder that contains your event. Create your new CTA in this folder.
Don't Miss Event Listings
Be sure to check out Event Listings: dynamically generated listings of upcoming events that update automatically as events are added to Paminga.
- Event Listings can be added to any CTA or Landing Page
- Event Listings can filter events by category, date, and more – create and publish different Event Listings by topic, geography, etc.
Event Listing Element

Social Posts on LinkedIn, Facebook, & Instagram
Schedule social posts that drive prospects to your event registration landing page.
Create an Event Registration Form
Open the Finder and right-click on the folder that contains your event. Create your form in this folder.
Add an Event Registration element to you new form.
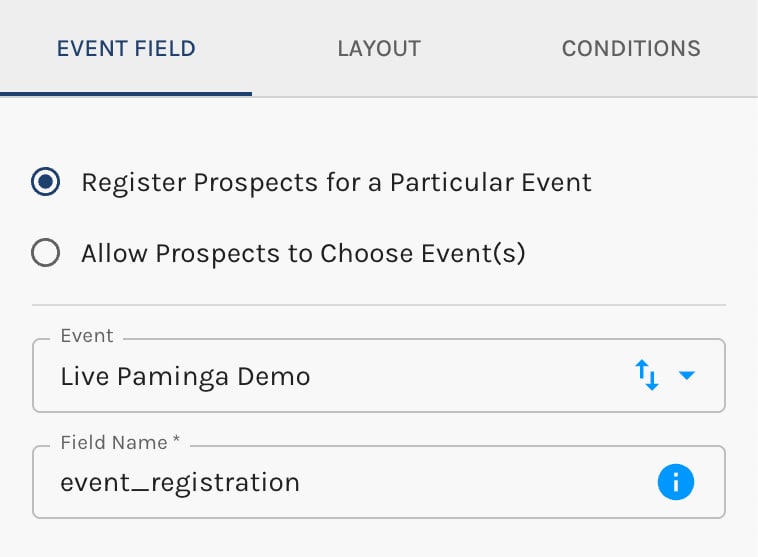
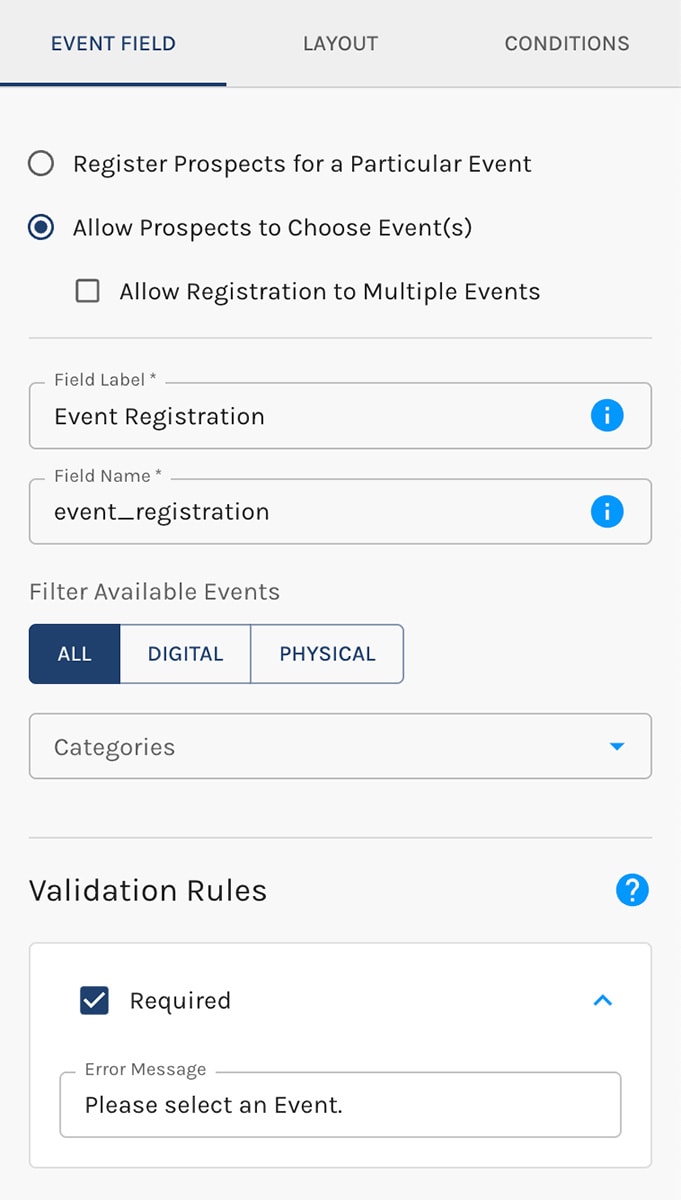
The Event Registration element can:
- Automatically register the contact for a specific event of your choosing
- Allow the contact to select an event to register for
Register for a Particular Event
Allow Propects to Choose Events
If you've chosen a specific event, the event registration field is hidden – not visible to your contact.
If you opt to allow the contact to select an event, the event registration field presents as a searchable drop-down.
Publish Your Form In Any Number of Locations:
- Embed your form into any web page you choose (as a
<div>, not an iframe) - Add your form to any Paminga Landing Page
- Add your form to any Paminga CTA (dynamic, personalized website section, banner, sidebar, or popup)
Upon Form Submission
The contact will be recorded as a registrant in both Paminga and your integrated events platform, if any.
From this moment forward, the contact will qualify for the "Did Register for the event named [This Event]" condition everywhere Paminga's Segment Builder appears.
Viewing Registrants
Double-click on your event in the Finder. This takes you to the "Event Details" screen where you can edit the event.
Notice there are three tabs at the upper left on this page:
- Details
- Registrants: Click this tab to view all registrants for your event. You may also choose to export them
- Attendees
Create an Event Registration Landing Page
Open the Finder and right-click on the folder that contains your event. Create your landing page in this folder.
Add your event registration form to your landing page.
Be sure to use tokens to inject the event's properties (name, date/time, registration URL, etc.) into your landing page. That way, if any of your event's details change, your landing page is updated automatically.
Event Registration Confirmation
Open the Finder and right-click on the folder that contains your event. Create an email that confirms the contact's registration for your event.
Be sure to use tokens to inject the event's properties (name, date/time, registration URL, etc.) into your email. That way, if any of your event's details change, your email is updated automatically.
Event Reminder Drip Series
Open the Finder and right-click on the folder that contains your event. Create a new Drip Series in this folder.
- Create emails that remind contacts that they've registered for an upcoming event
- Create each of these emails in the Finder folder that contains your event. Even better, create a child folder for your reminder emails
- Be sure to use tokens to inject the event's properties (name, date/time, registration URL, etc.) into your emails. That way, if any of your event's details change, your emails are updated automatically
- Create the Drip Series Audience based on contacts who have registered for your event (available as a segment condition)
- Send those emails via a Drip Series with whatever cadence you choose
Event Check-In Form
If it's a physical, IRL event, you can create a form that lets registrants check-in at your event.
Open the Finder and right-click on the folder that contains your event. Create your form in this folder.
Add an Event Check-In element to you new form.
Go to Form Actions and configure its settings:
Event Check-In Action
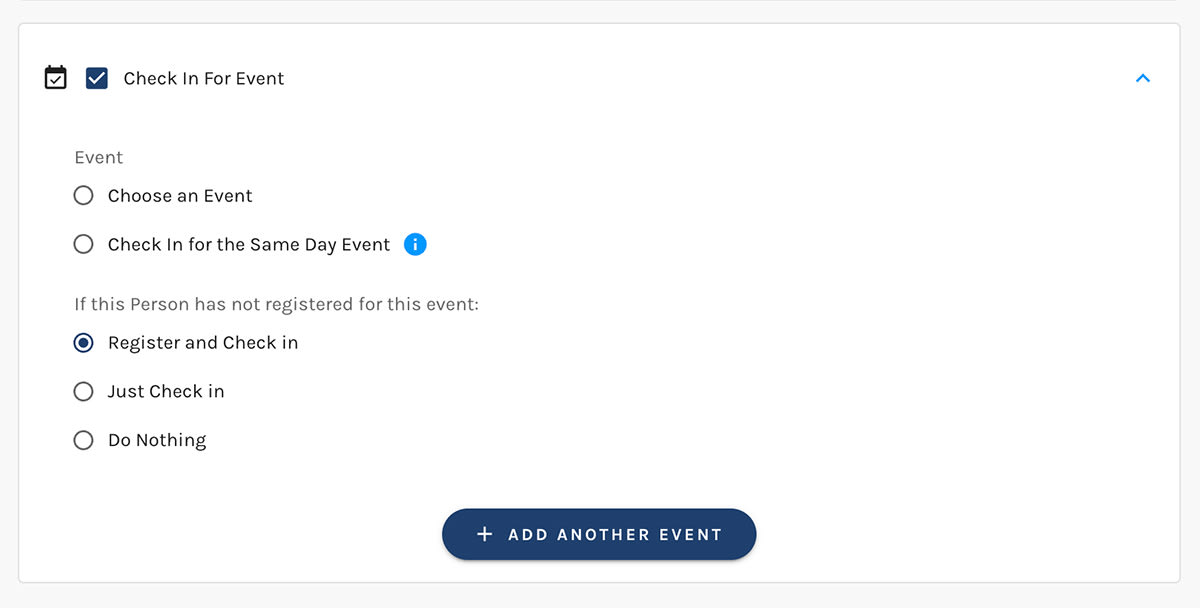
The Event Check-In element also allows prospects to register and check-in simultaneously.
Publish your check-in form on a dedicated Landing Page.
Generate a QR code (via free 3rd party tools) that points to this page.
Registrants can scan the QR code and check themselves in via the phones.
When The Event Is Over
If it's a digital event, Paminga will sync all attendees from your connected events platform into Paminga automatically.
From this moment forward, the contact will qualify for the "Did Register for the event named [This Event]" condition everywhere Paminga's Segment Builder appears.
Viewing Attendees
Double-click on your event in the Finder. This takes you to the "Event Details" screen where you can edit the event.
Notice there are three tabs at the upper left on this page:
- Details
- Registrants
- Attendees: Click this tab to view all attendees for your event. You may also choose to export them
Thank Attendees
Open the Finder and right-click on the folder that contains your event. Create an email to thank attendees when the event is over.
Be sure to use tokens to inject the event's properties (name, date/time, registration URL, etc.) into your email. That way, if any of your event's details change, your email is updated automatically.
Registered But Did Not Attend
Open the Finder and right-click on the folder that contains your event. Create a "Sorry We Missed You" email to let contacts know just what they missed out on.
Be sure to use tokens to inject the event's properties (name, date/time, registration URL, etc.) into your email. That way, if any of your event's details change, your email is updated automatically.
Never Registered
How about an email for those who never registered?
Open the Finder and right-click on the folder that contains your event. Create a "See What You Missed" email to let contacts know just what they missed out on.
Be sure to use tokens to inject the event's properties (name, date/time, registration URL, etc.) into your email. That way, if any of your event's details change, your email is updated automatically.
Event Components & Tools
Paminga provides several pre-built components & tools to make it easy to build awareness, drive registrations, and capture event check-ins.
Event Listing Composition
The Event Listing Composition may be added to any Landing Page or CTA (which may be embedded on any web page you control).
You can easily control:
- Which events are listed
- The content shown for events
- The styling of each event "card" (overall styling is controlled by your chosen Brand Kit)
Event Listing Element
Filter Upcoming Events
You may filter the events that appear in the Event Listing component in several useful ways:
- By category
- By event date
- Limit to a maximum number of events
Event Listing – Filter Events

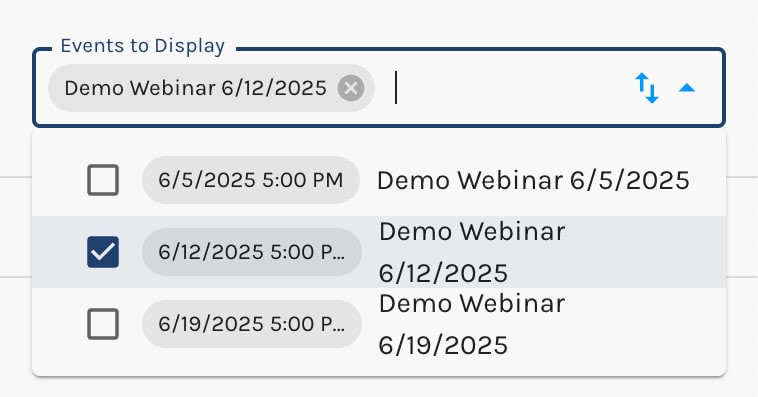
Choose Specific Events
If you choose to display specific events, you are able to easily select them via checkboxes:
Event Listing – Specific Events
Styling Your Event Listing
The Event Listing component will look pretty good out of the box, with fonts honoring your chosen Brand Kit. Your upcoming events will be displayed in a grid.
You are able to control many aspects of the grid, as well as the styling and content of each event "card":
- Background color, borders, and positioning (centered, left, right)
- Choose which event fields (i.e. event name, date, location...) show in your event cards
- Control styles for each event field individually. For example, you can change the font size of the event name.
- Drag & drop to change the order that event fields appear in your cards
Event Registration Form Field and Action
Paminga's Form Builder includes an "Event Registration" form field.
- Allow prospects to register for a particular event
- Allow prospects to choose a single event – or multiple events – for which they will be registered
Event Registration Form Field
If you choose to "Register Prospects for a Particular Event", the form field becomes hidden.
Event Registration Action
When you add an event registration field to your form, you'll find that the Event Registration Action is enabled automatically as one of your form's "Global Actions".
This is done to add clarity: every submission of your form will result in an event registration. This makes it clear to anyone looking through the actions configured for your form.
Event Registration Action

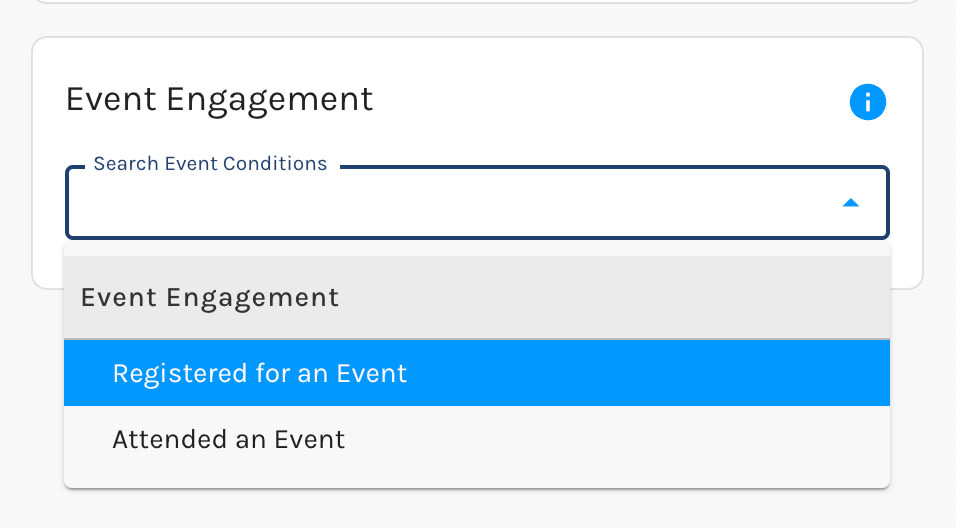
Segmentation: Did/Not Register / Attend Events
The ability to segment on leads/contacts who did/not register or attend any event gives you capabilities across the platform.
- Create audiences for any drip series or workflow based on event registration or attendance (or lack thereof)
- Score leads based on event registration or attendance
- Filter dashboards and data exports based on event registration or attendance
- And much, much more
Event Segmentation